We know that as a therapist, your attention belongs with your client—not your keyboard. That's why we're excited about AI-Assisted Progress Notes with Ambient Documentation.
Ambient Documentation listens to your session (with client consent) and automatically captures the conversation in real time. Instead of trying to remember every detail after the appointment, you can stay engaged with your client while AI creates a structured clinical progress note for your review.
In this guide, we'll walk through how to use the Ambient Documentation capture method from start to finish.
When to Use Ambient Documentation
Ambient Documentation is ideal when you want AI to document the conversation as it happens during a live session.
Use this capture method when:
- You want to remain fully engaged with your client instead of taking detailed notes.
- You are conducting an individual therapy or peer support session.
- You want AI to capture both clinician and client dialogue automatically.
- You prefer reviewing and editing a completed draft rather than documenting from memory afterward.
- You have obtained the client's consent to record the session.
Best Practices for Ambient Documentation
For the highest quality AI-generated notes:
- Obtain client consent before starting every recording.
- Speak naturally. There is no need to change how you normally interact with your client.
- Limit background noise whenever possible for better transcription accuracy.
- Use one microphone positioned where both participants can be heard clearly.
- Avoid multiple conversations occurring in the room at the same time.
- Review every AI-generated note before inserting it into the official progress note.
- Add any important clinical observations that may not have been spoken during the session.
Common Mistakes to Avoid
- Starting without consent. Always obtain client consent before recording.
- Closing the recording window during upload. Wait until the session has completely uploaded before leaving the page.
- Skipping your review. AI-generated notes should always be reviewed for clinical accuracy before signing.
- Poor audio quality. Excessive background noise or quiet voices can reduce transcription quality.
- Assuming AI knows everything. The generated note is based only on what was captured during the recording.
Step-by-Step Guide
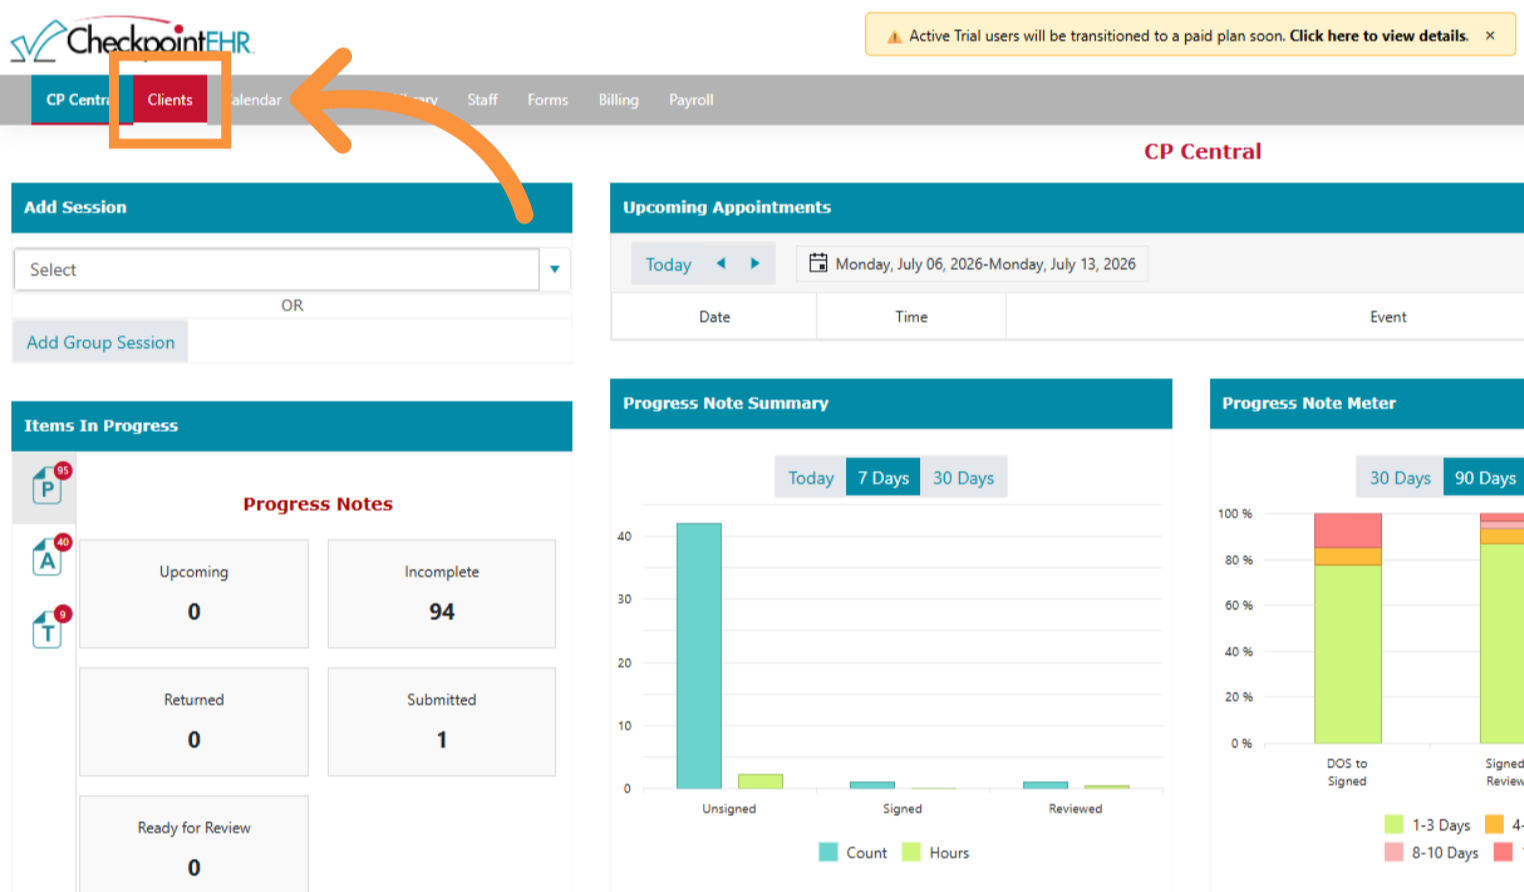
1. Access Clients Section
Log in to Checkpoint EHR and select Clients from the main navigation menu.
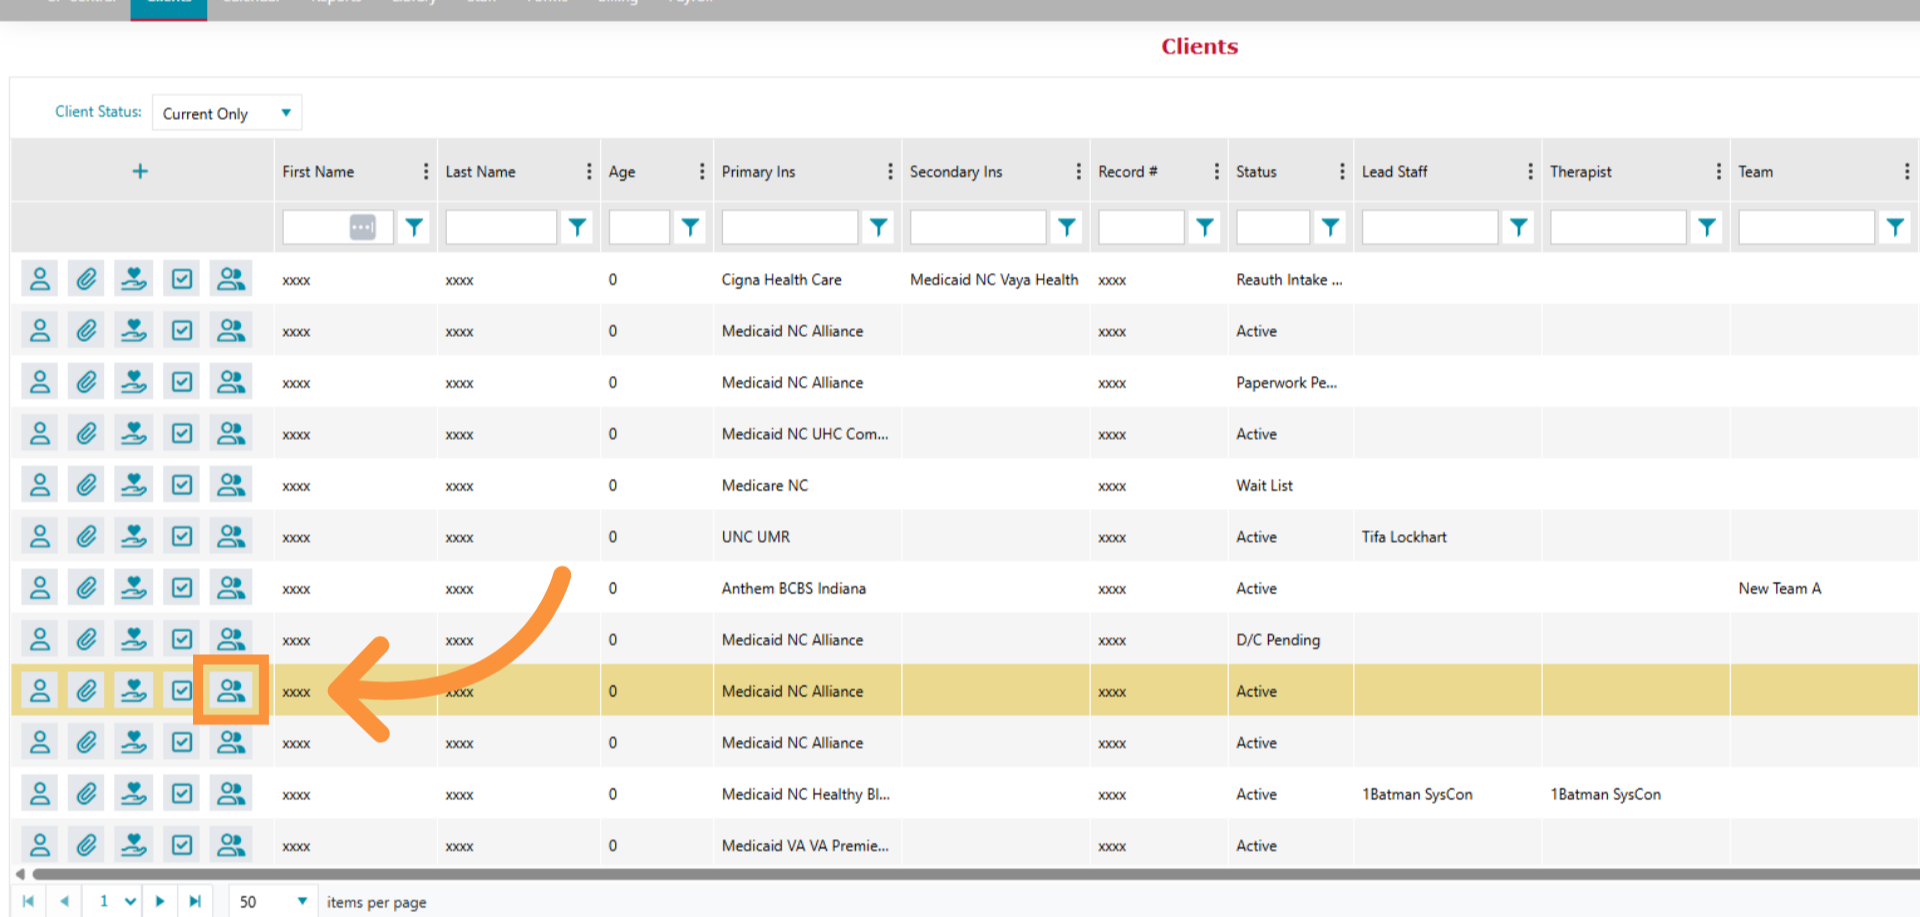
2. Open Client Sessions
Locate your client and select the Client Sessions icon to access their session history.
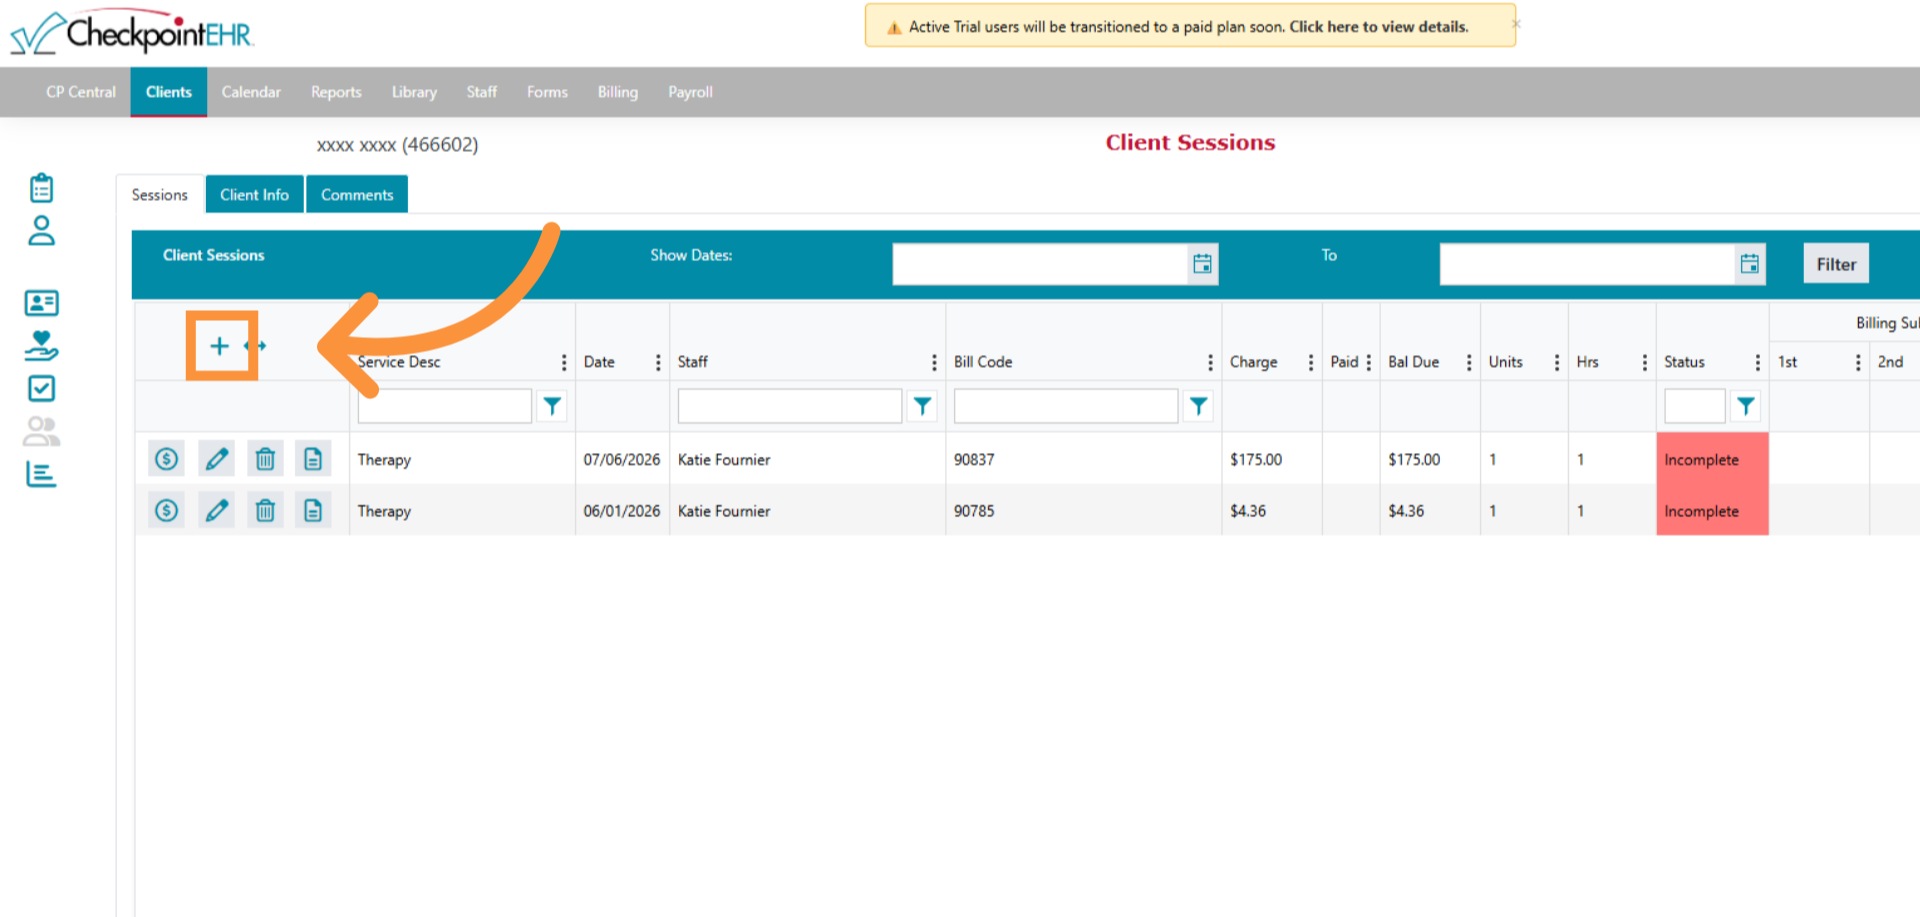
3. Create a New Session
Select Add (+) and complete your session information, including:
Service
Date of Service
Billing Code
Duration
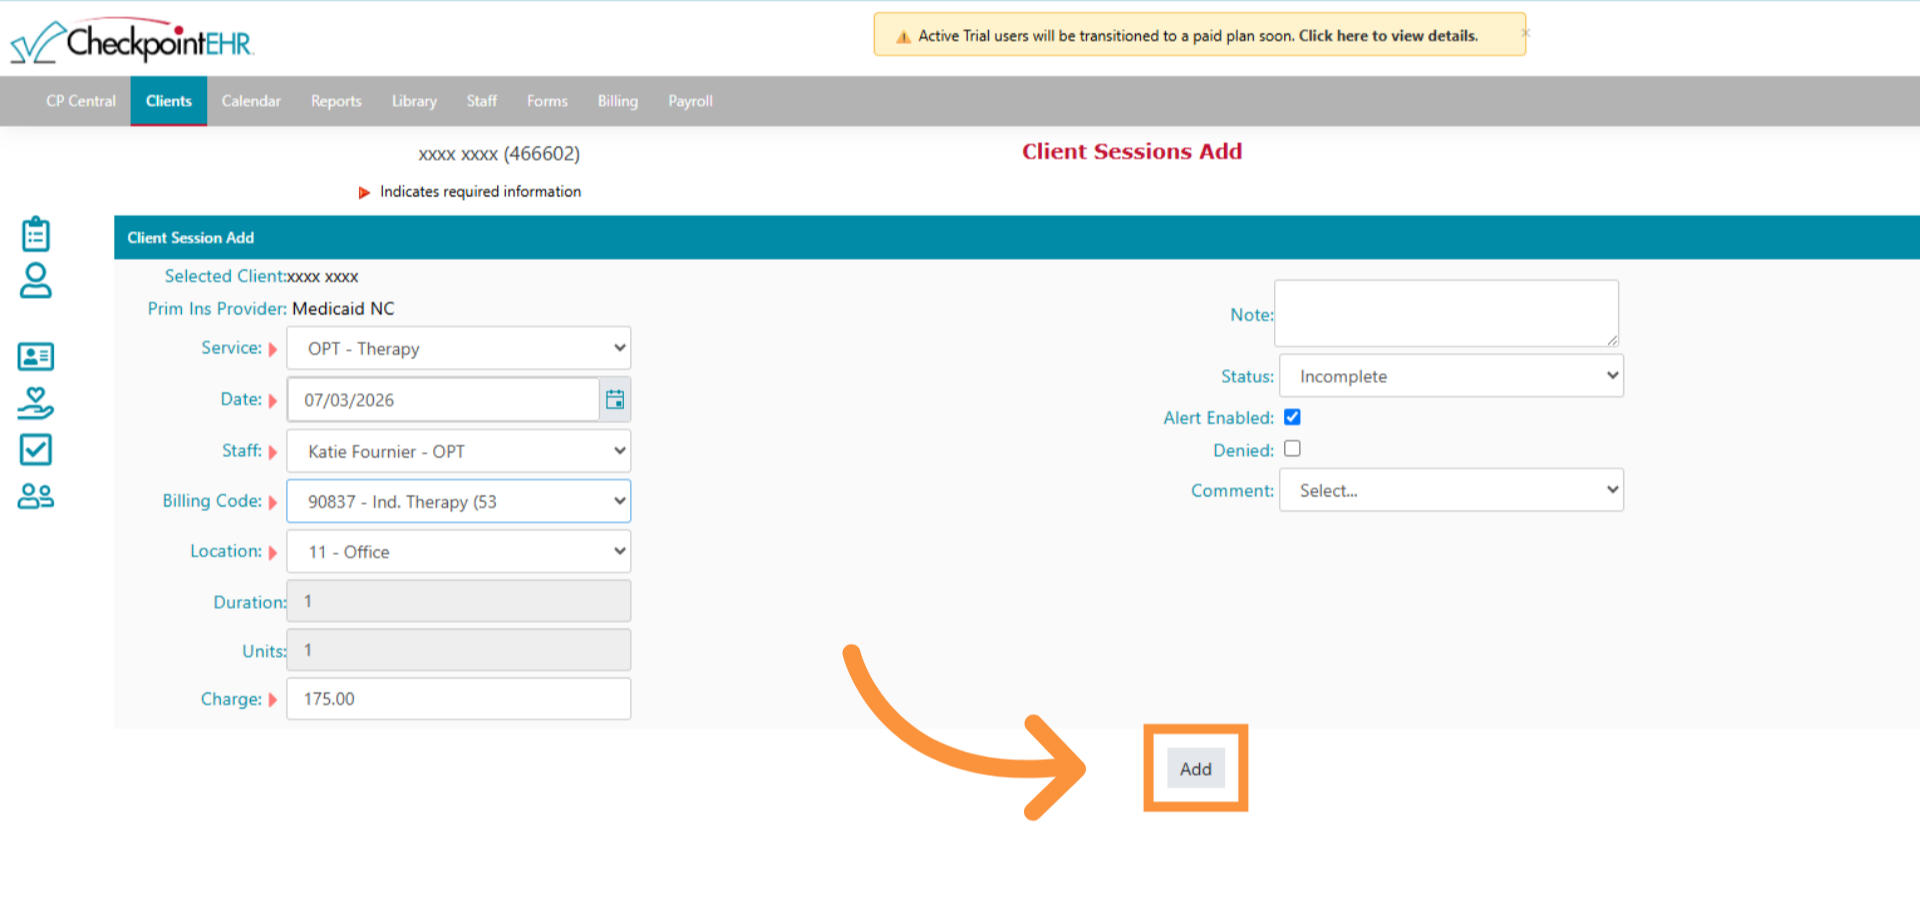
4. Add Session Entry
Click Add to create the session.
5. Complete Your Progress Note Information
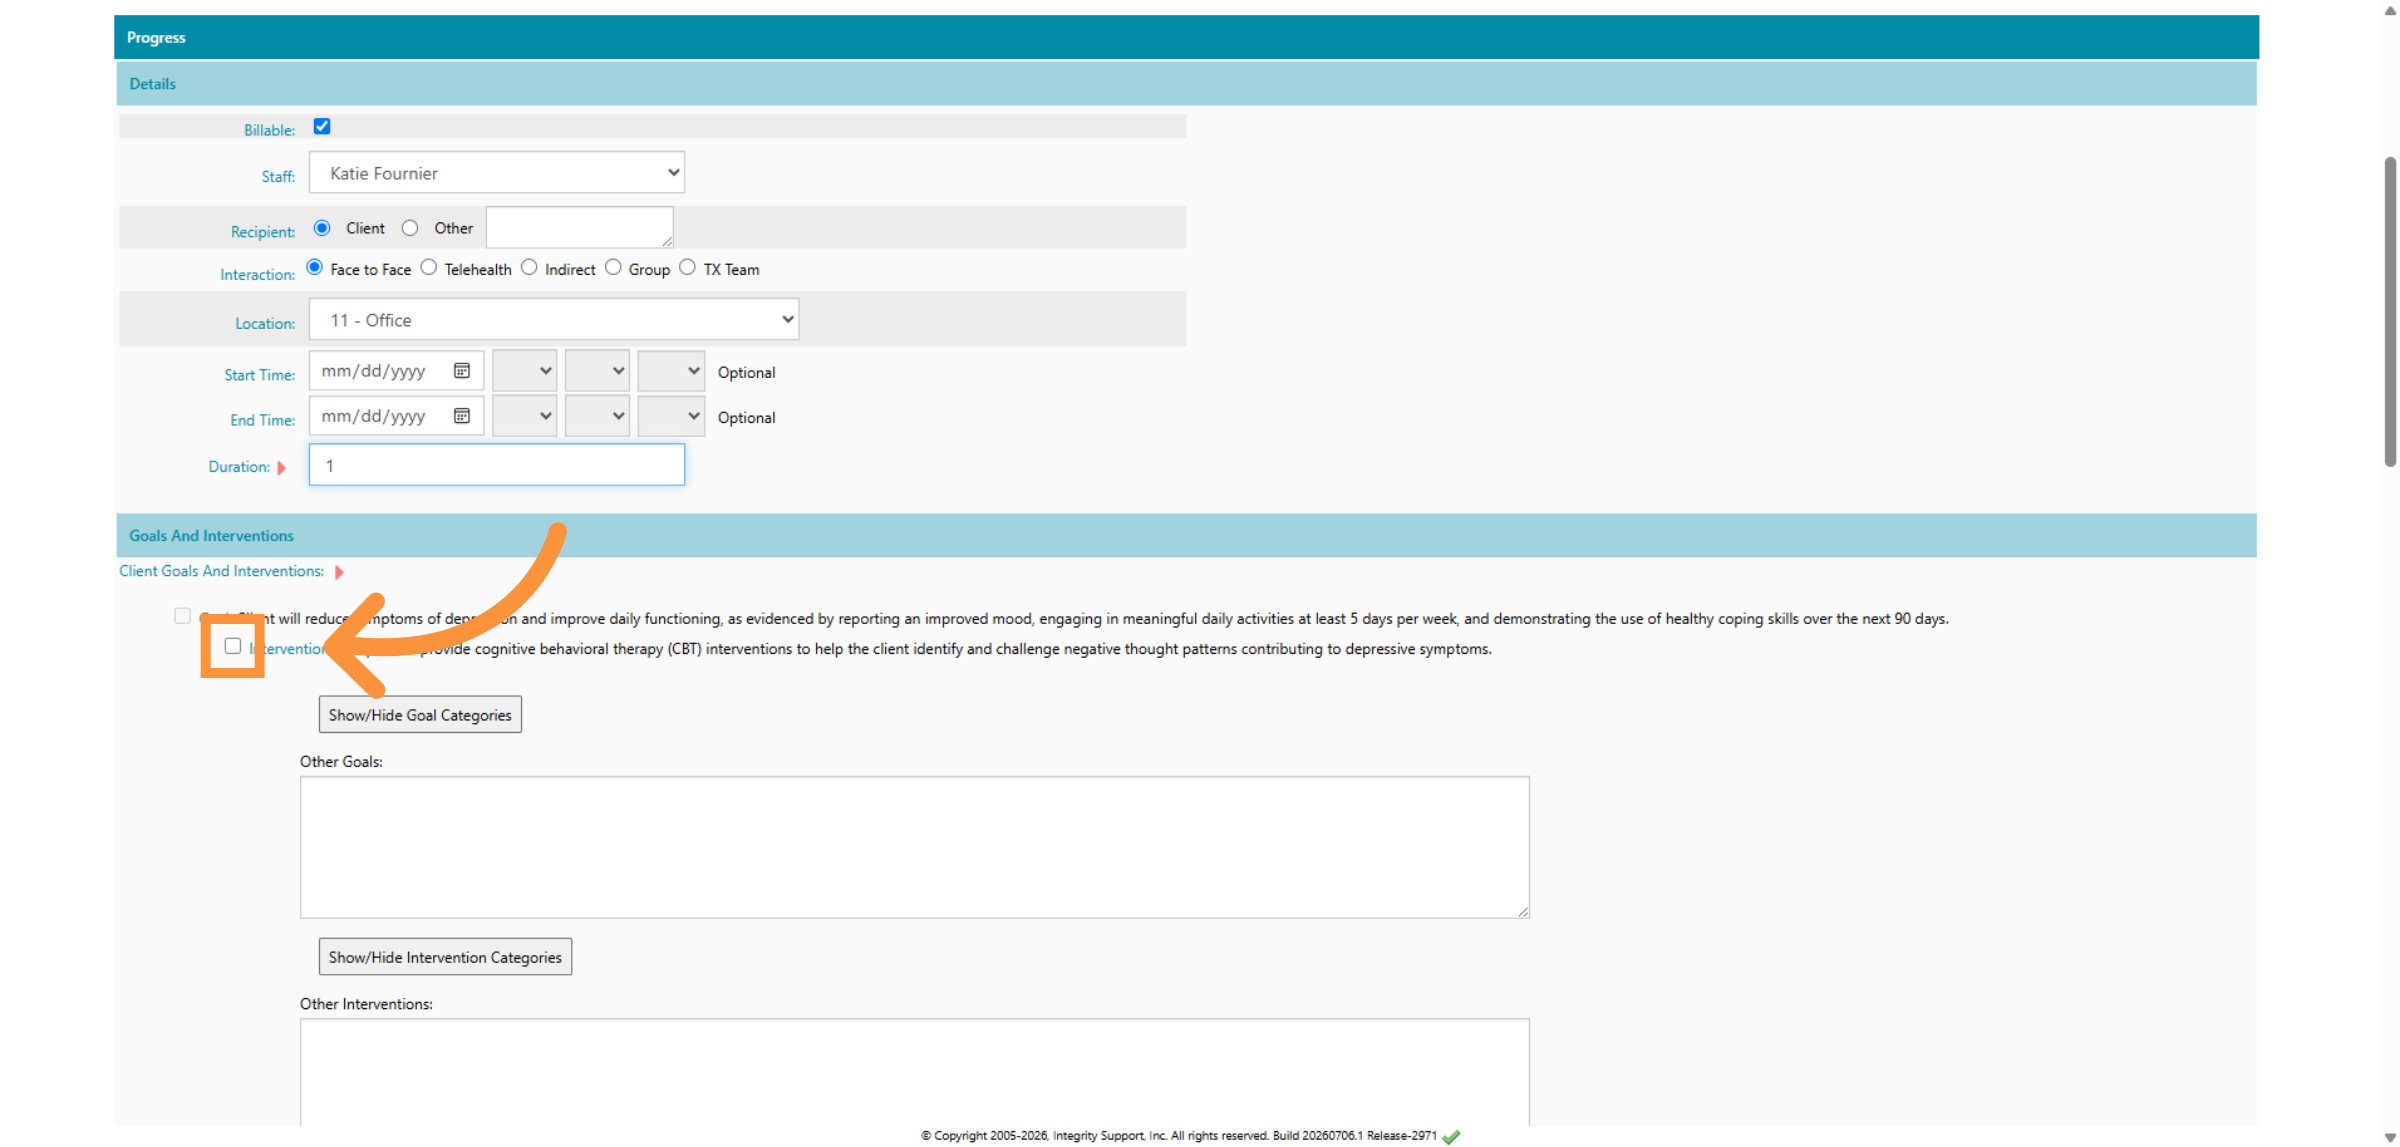
Enter your Goals and Interventions as you normally would. These fields will be incorporated into your AI-generated progress note.
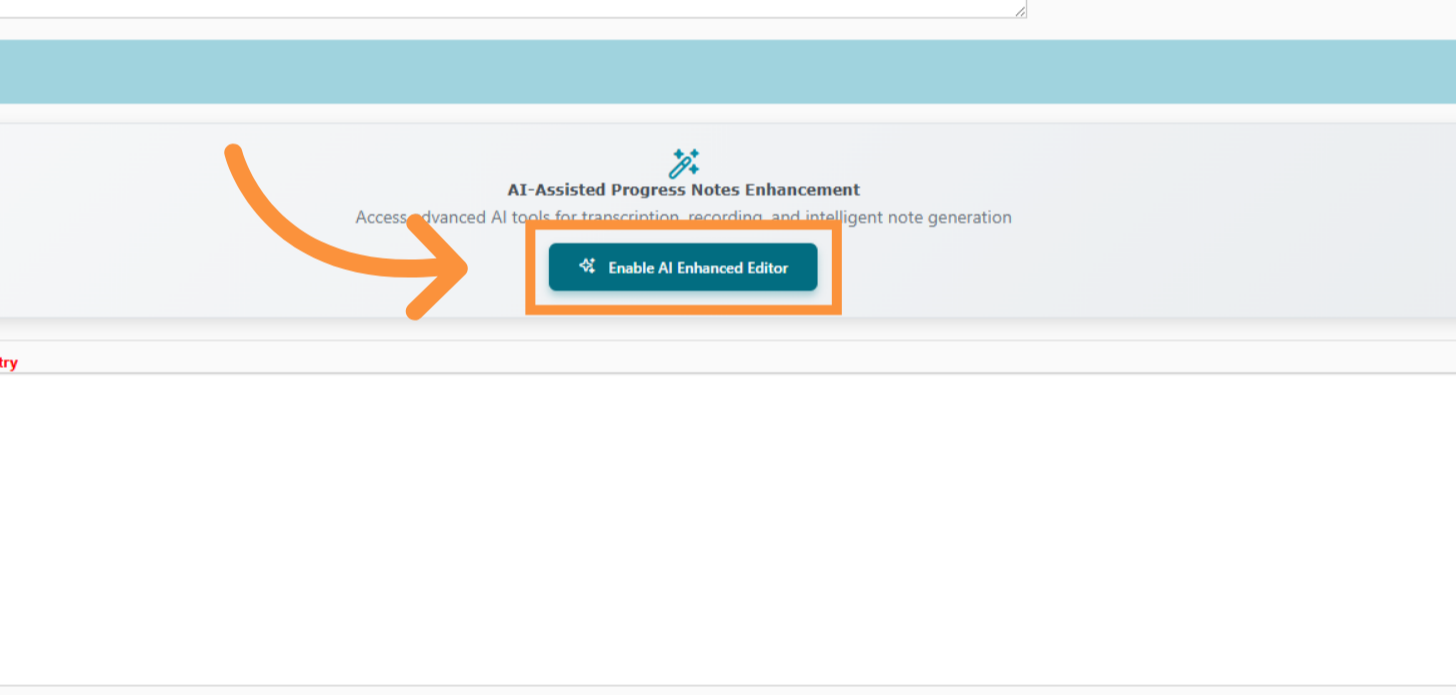
6. Enable AI Enhanced Editor
Select Enable AI Enhanced Editor to activate AI documentation features.
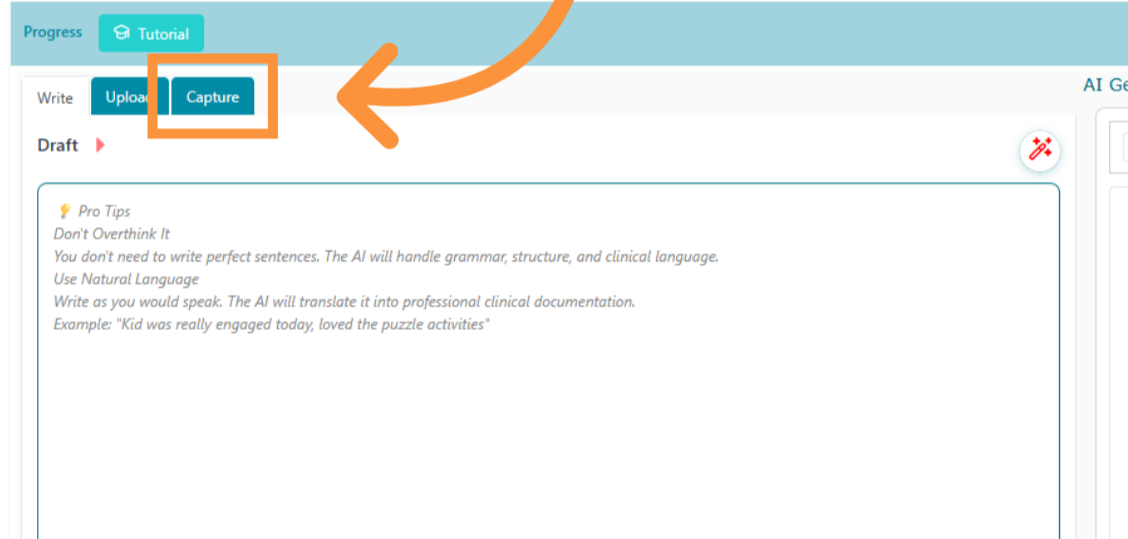
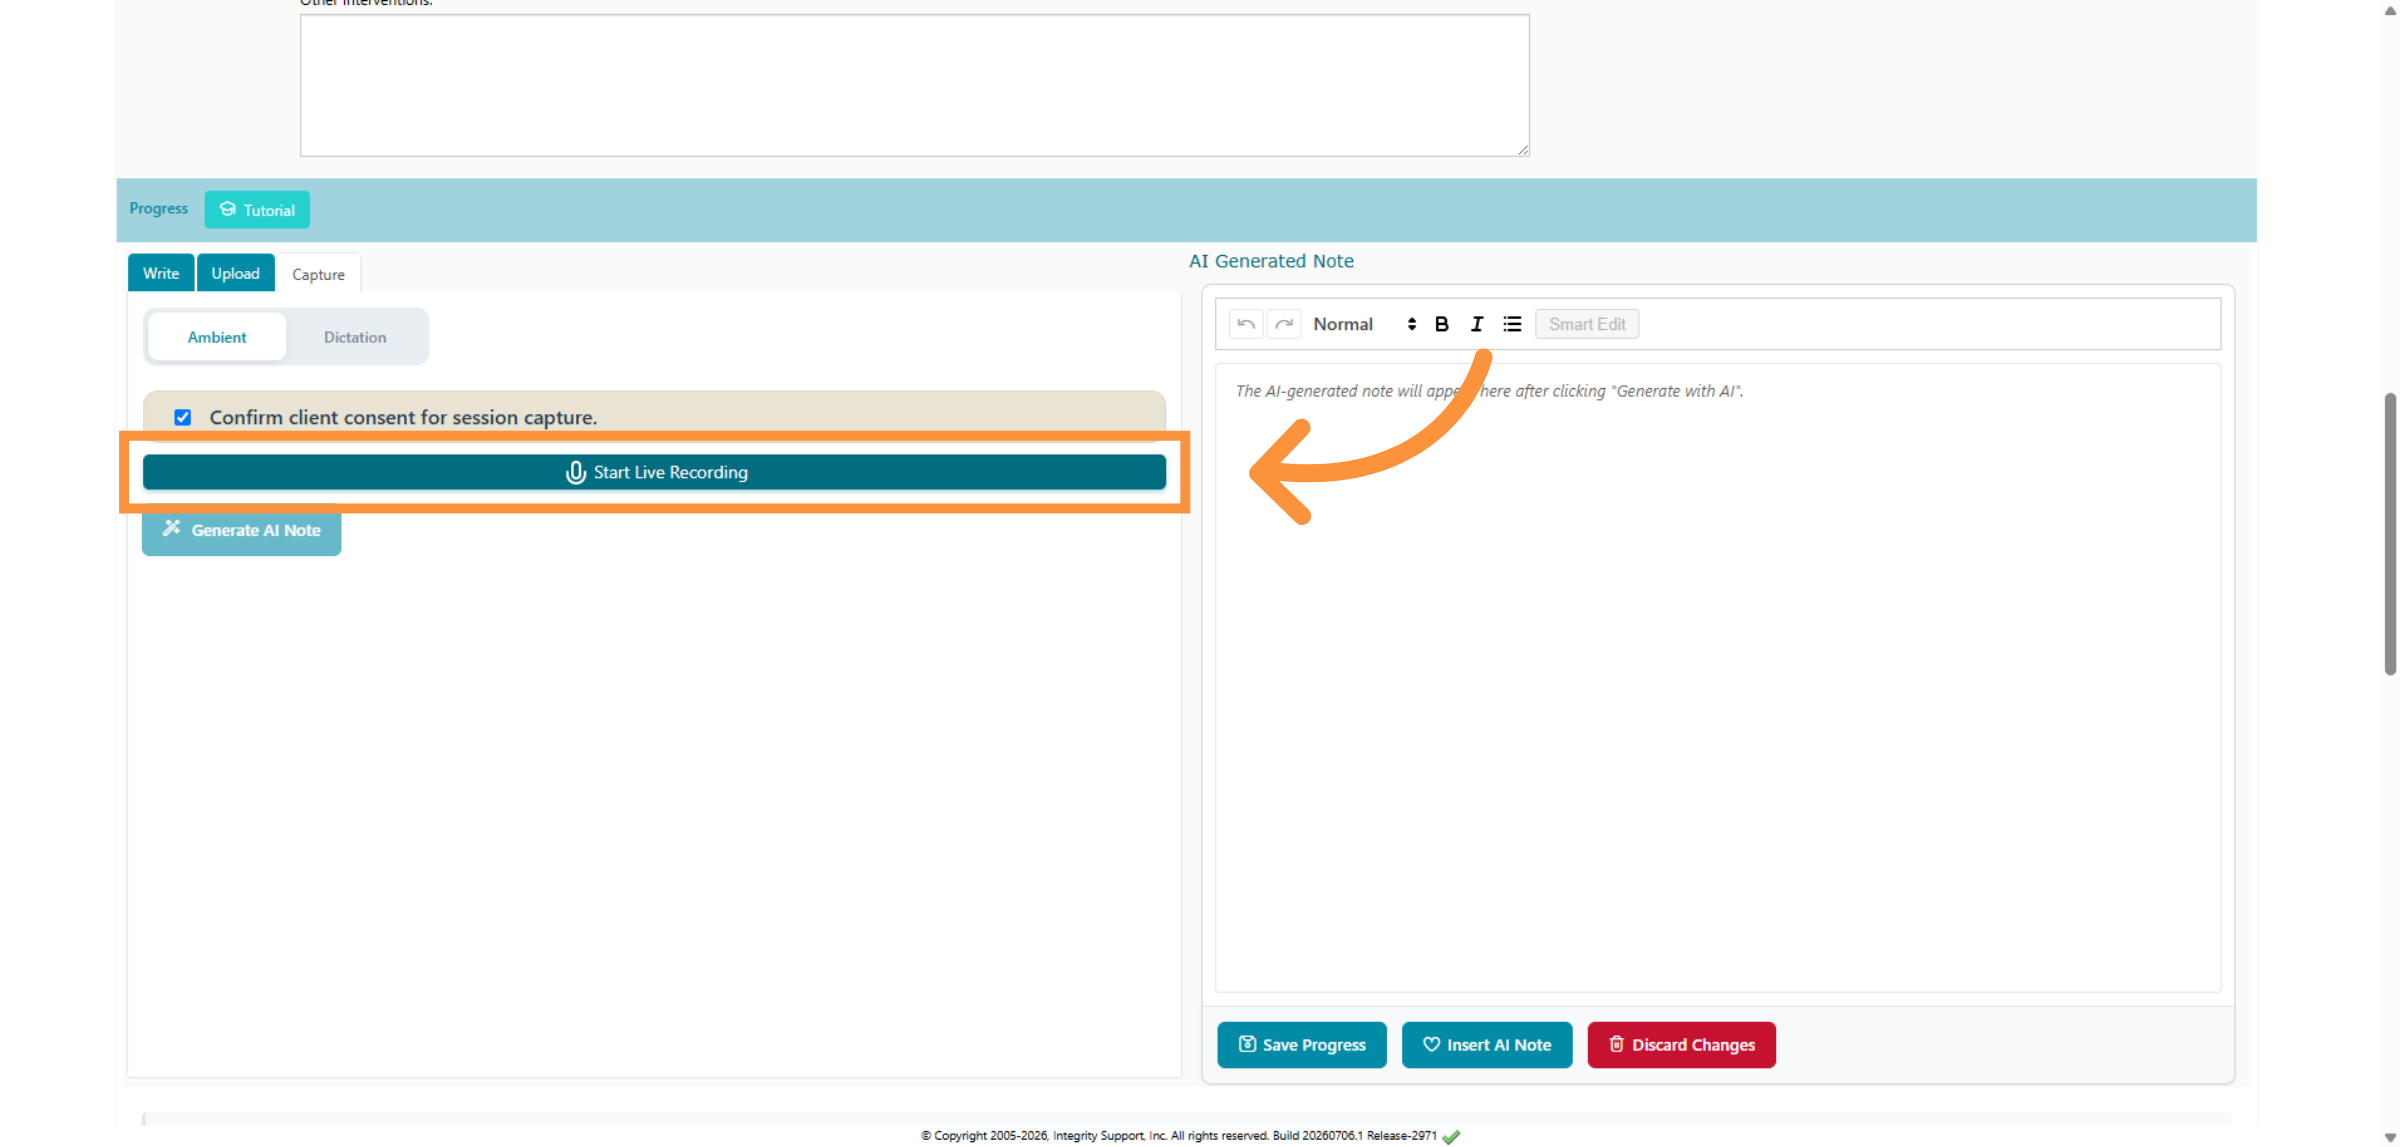
7. Select the Capture Tab
Choose the Capture tab from the AI Enhanced Editor. Select Ambient as your capture method.
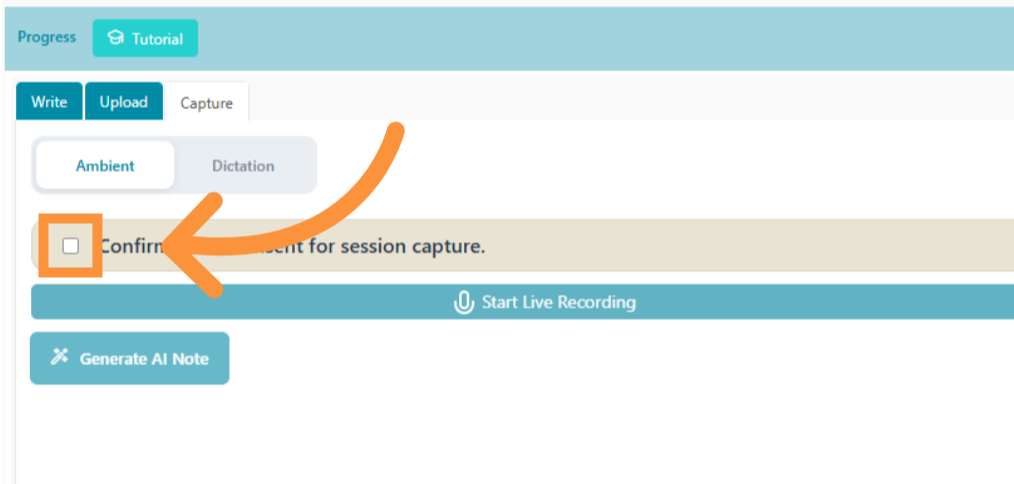
8. Confirm Client Consent
Before beginning the recording, confirm that your client has consented to the use of Ambient Documentation.
9. Start the Live Session
Once consent has been obtained, select Start Live Recording.
Important: Ambient Documentation should only be used after obtaining your client's permission.
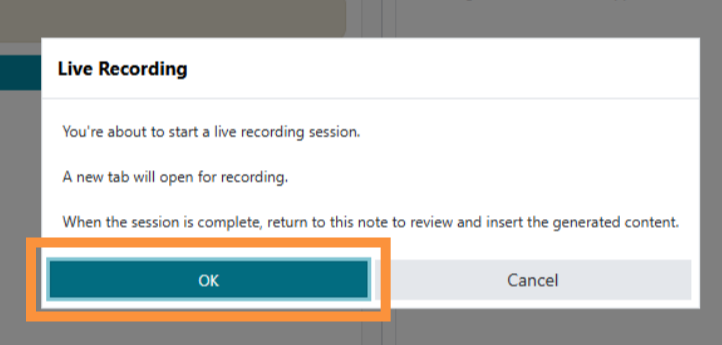
10. Confirm Action
Click "OK" to acknowledge and proceed with the current operation.
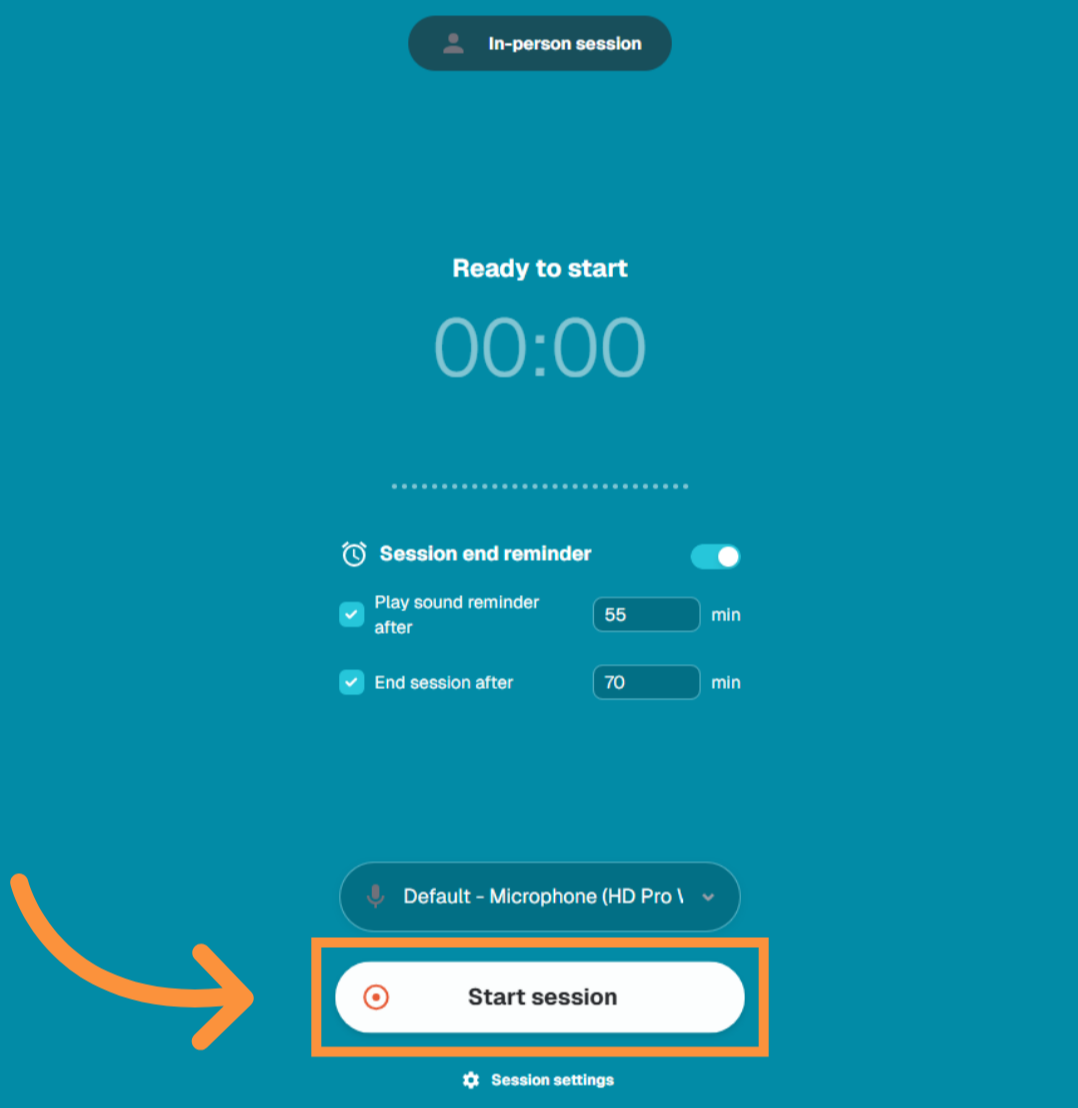
11. Start the Live Session
A new Ambient Documentation window will open.
Review your microphone selection, if necessary, then select Start Session to begin recording.
12. Conduct Your Session Naturally
Continue your appointment as you normally would.
The AI listens to the conversation in the background while you remain focused on your client.
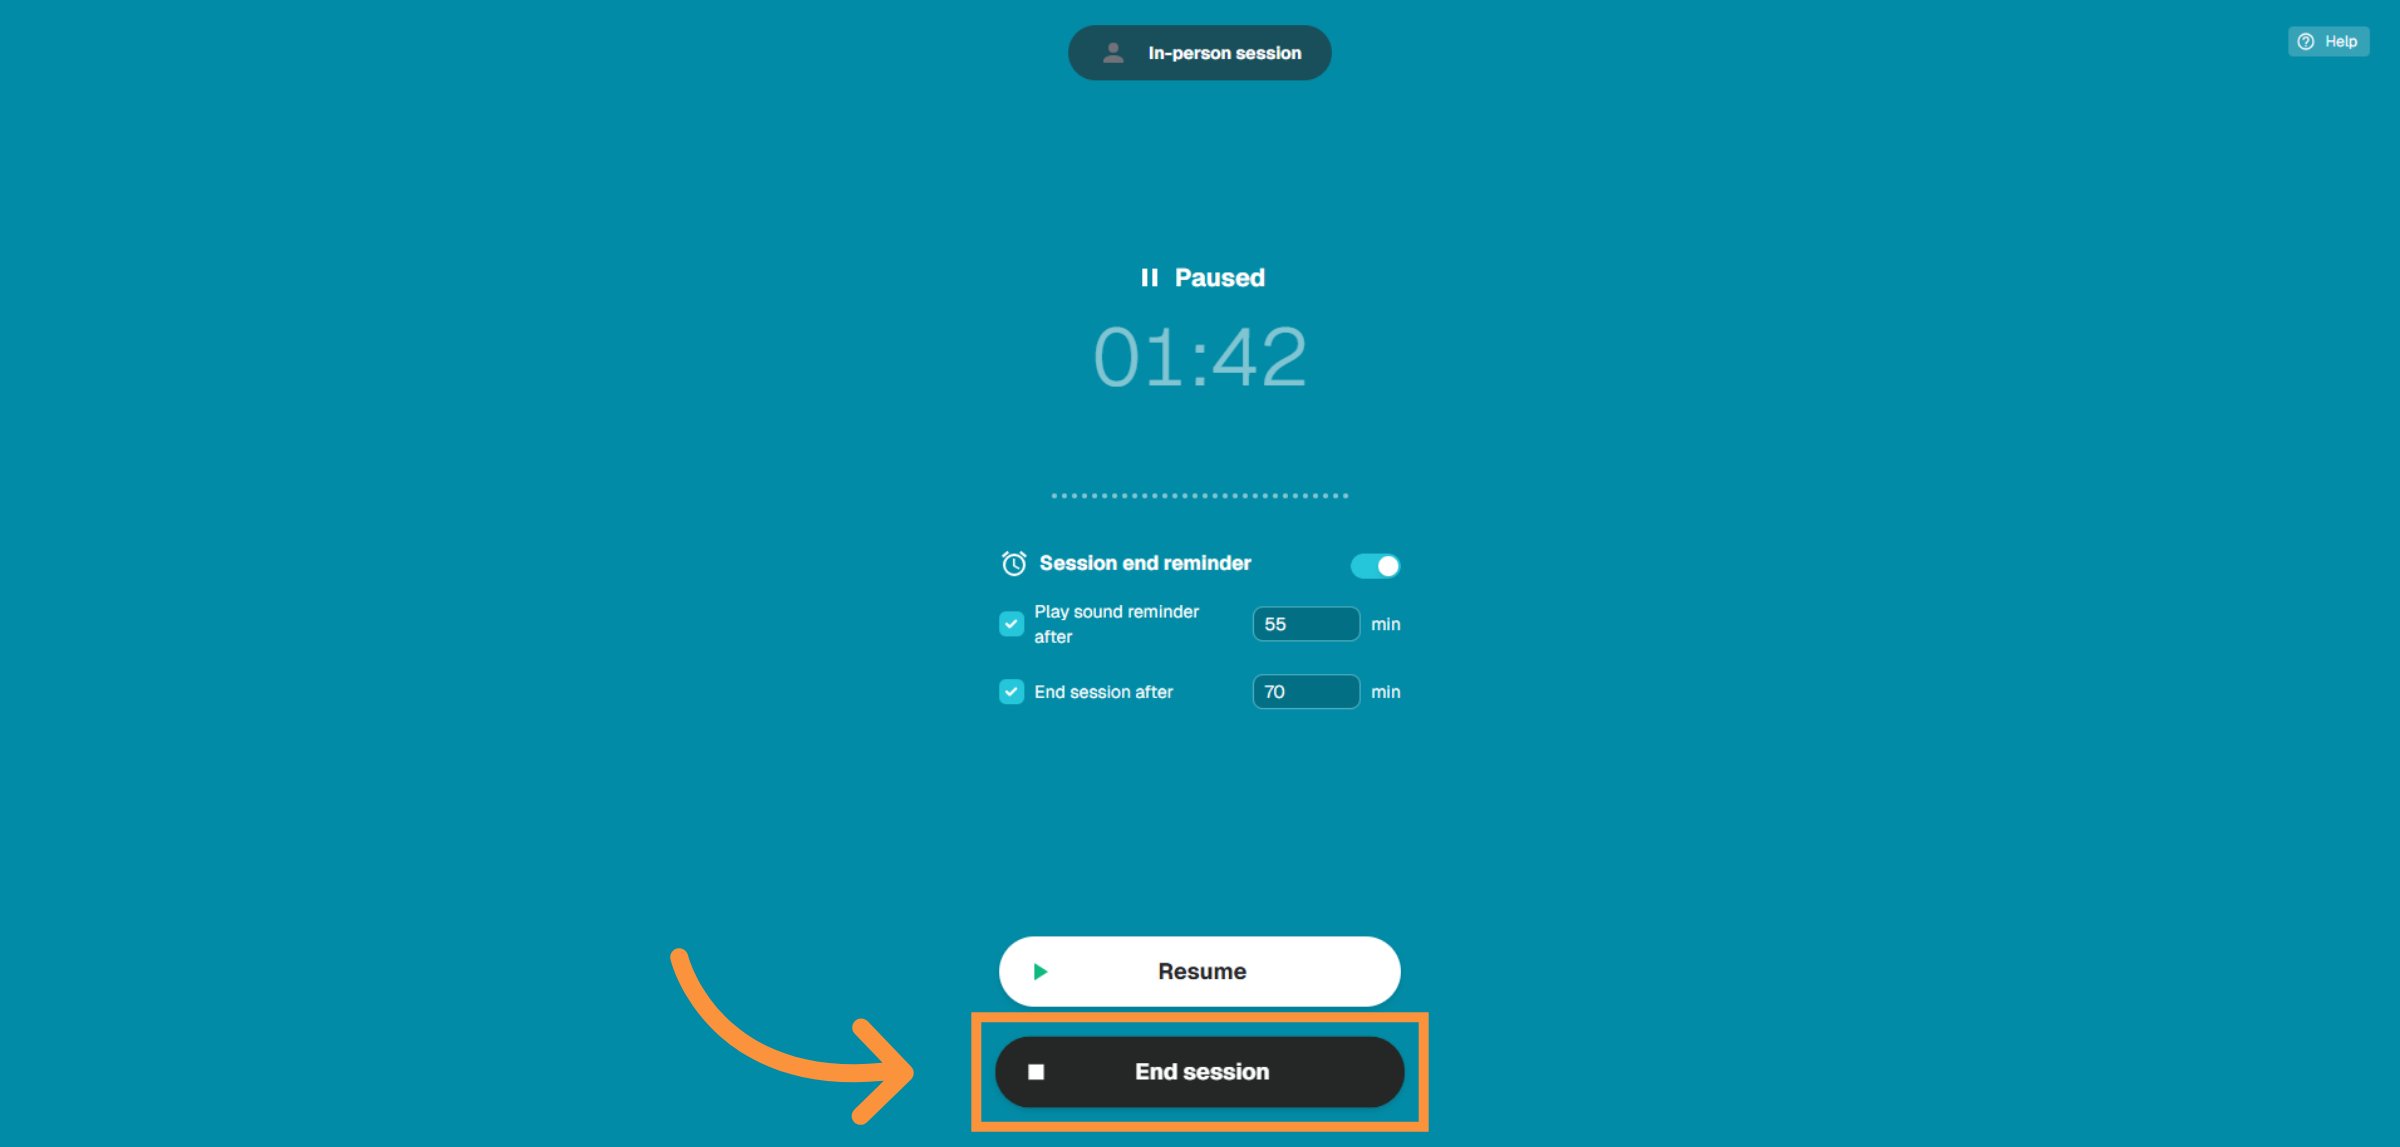
If necessary, you can:
Pause recording
Resume recording
End the session when complete
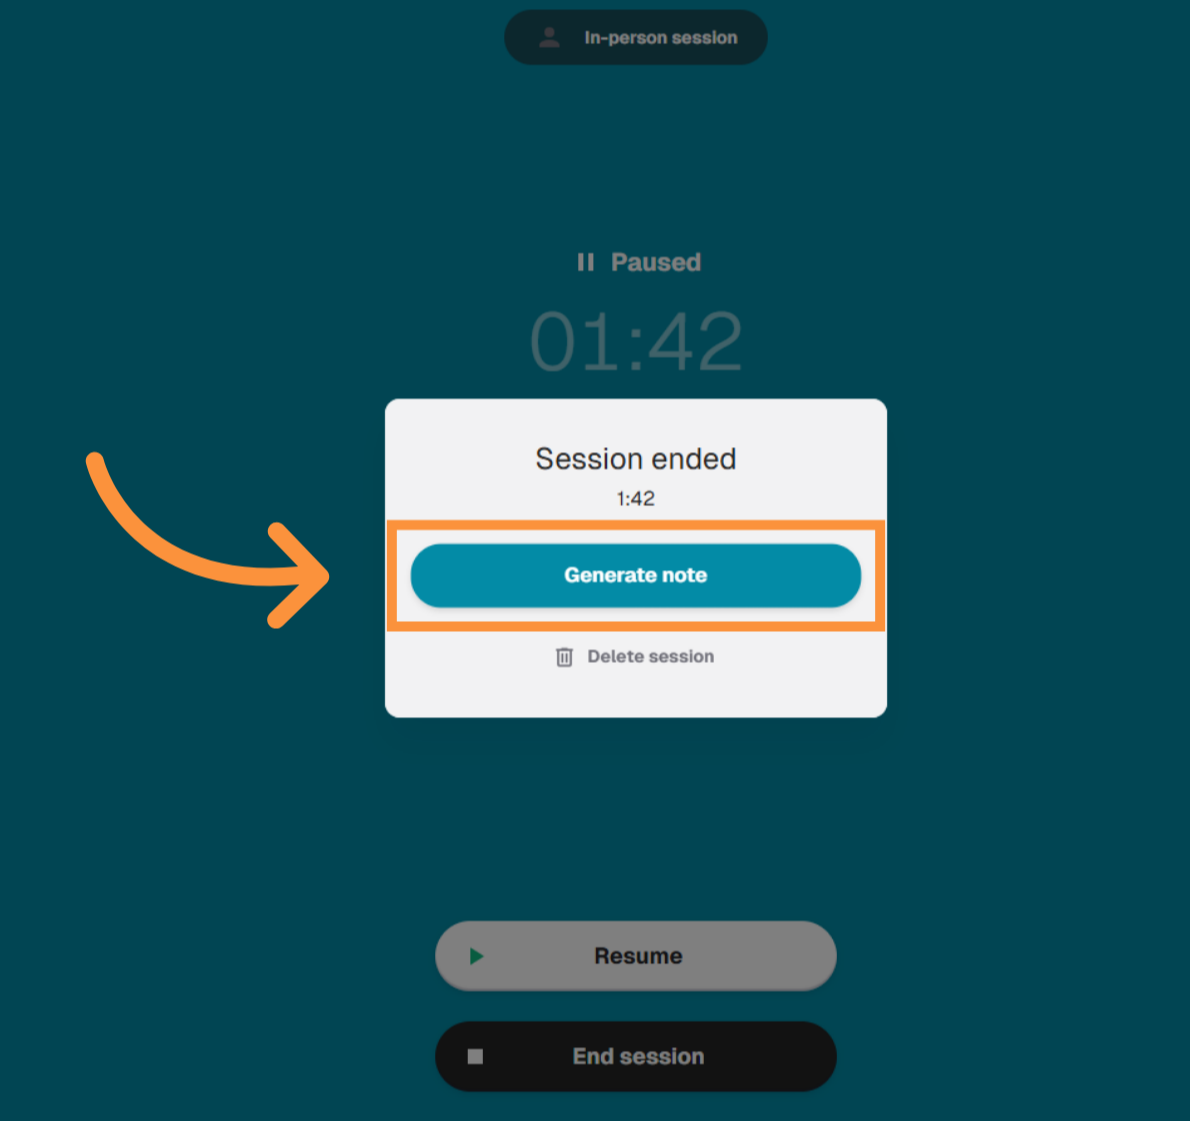
13. End the Recording
When your session is complete, select End Session.
14. Generate Session Note
Choose Generate Note to begin creating your AI-assisted progress note.
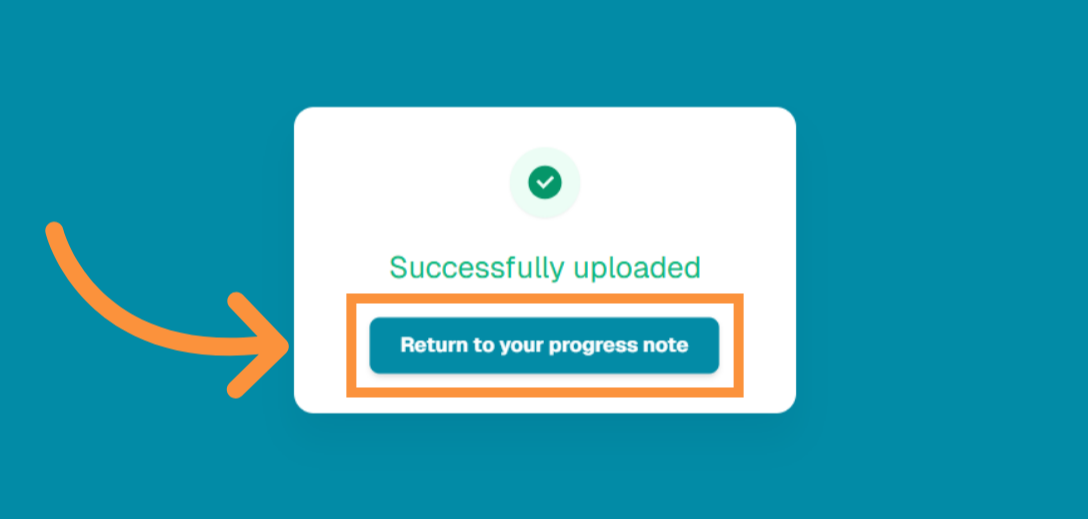
15. Wait for Processing
The recording will upload and process automatically.
Do not close the browser window while your recording is uploading. Once processing is complete, return to your progress note.
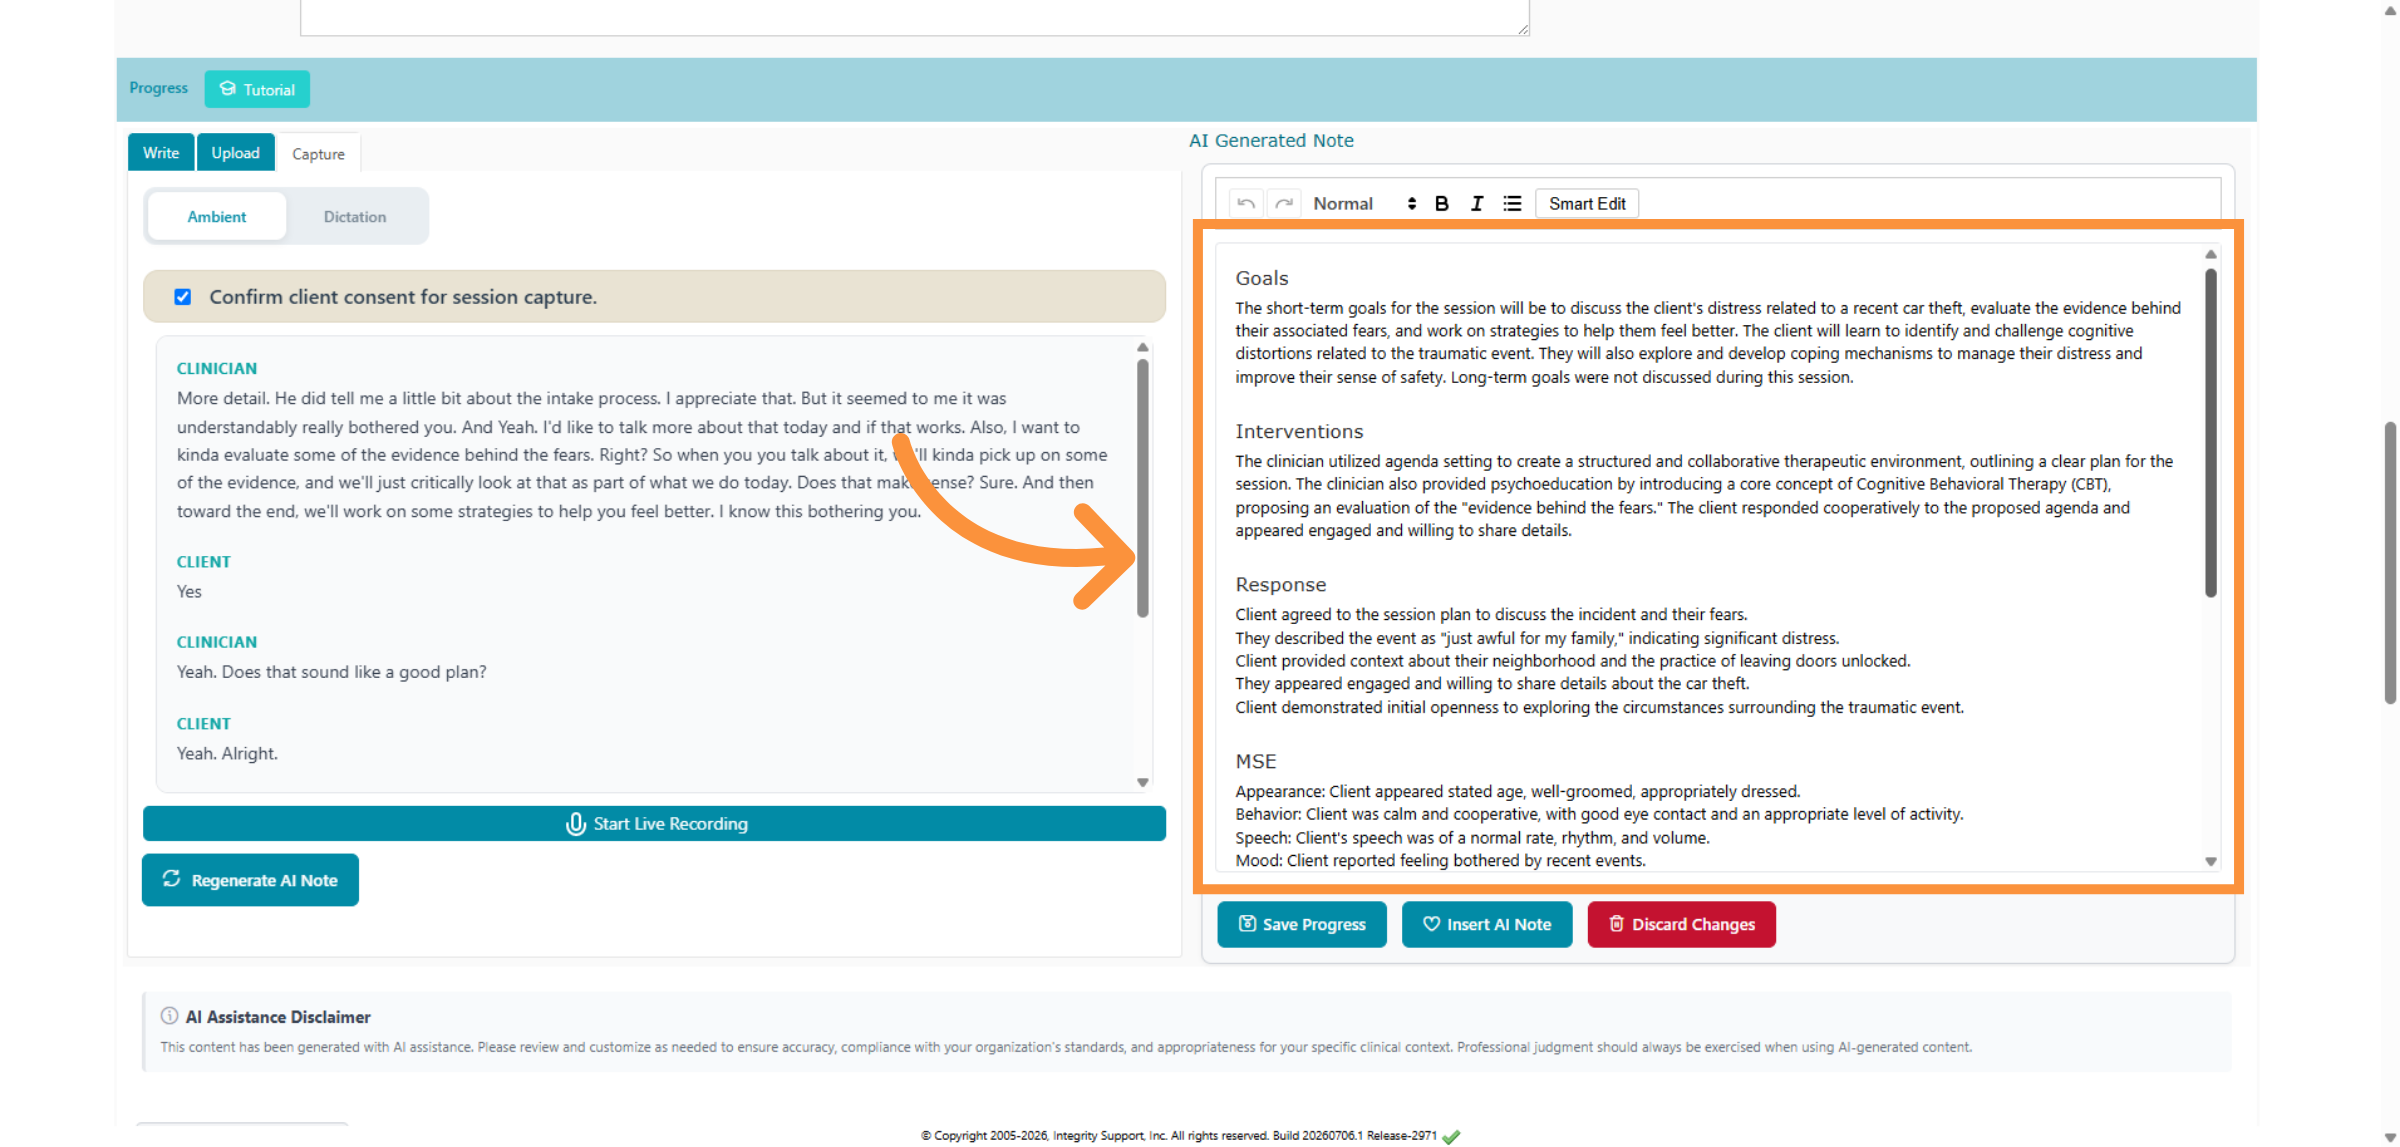
16. Review the AI-Generated Note
The completed AI-generated progress note will appear in the AI Generated Note panel.
Review the note carefully for:
Goals
Interventions
Client Response
Mental Status Exam (if applicable)
Clinical accuracy
Completeness
17. Make Any Necessary Edits
If desired, use the available formatting tools or Smart Edit to improve readability or make revisions before inserting the note.
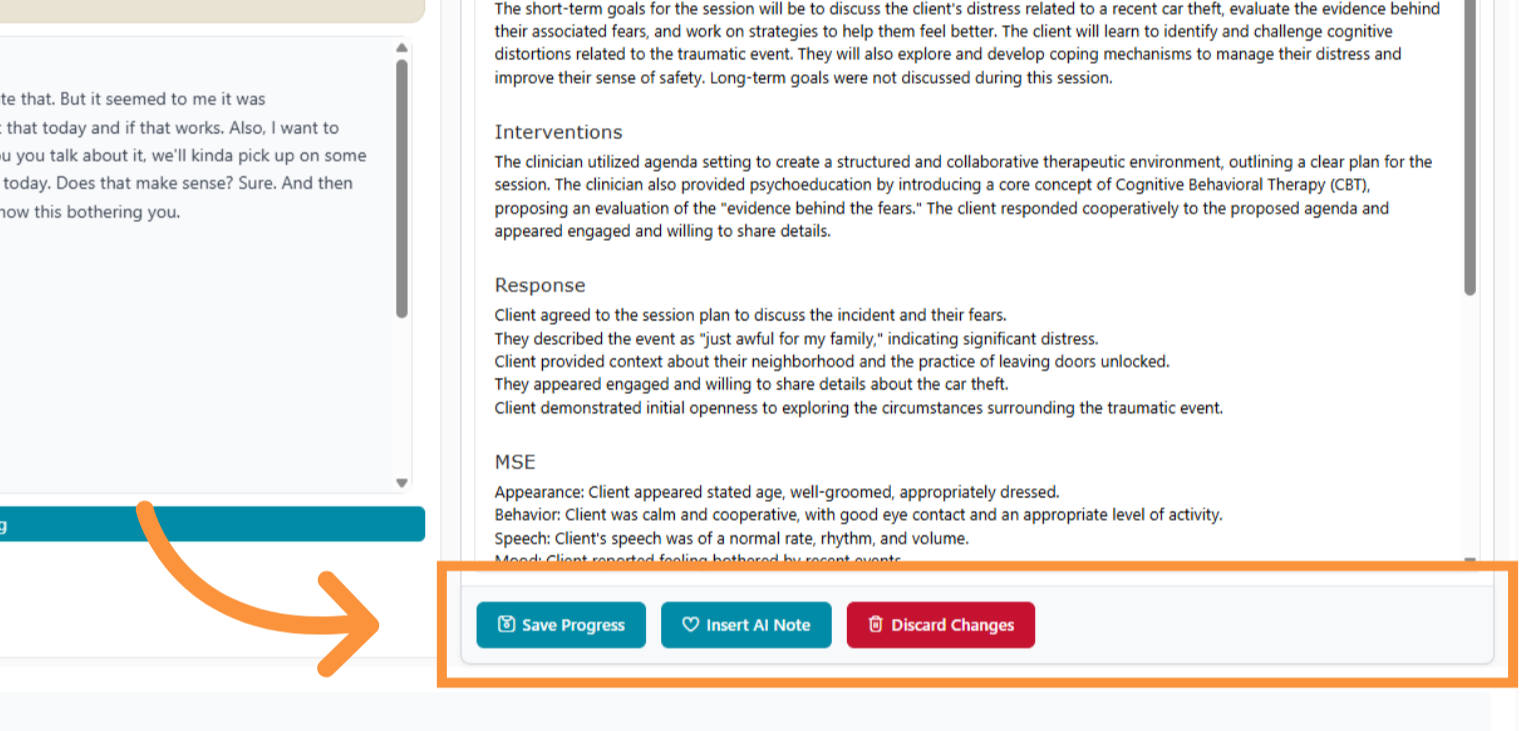
18. Insert the AI Note
Once you're satisfied with the generated documentation, choose one of the following options:
Save Progress to continue editing later.
Insert AI Note to transfer the AI-generated content into your official progress note.
Discard Changes if you do not wish to use the generated note.
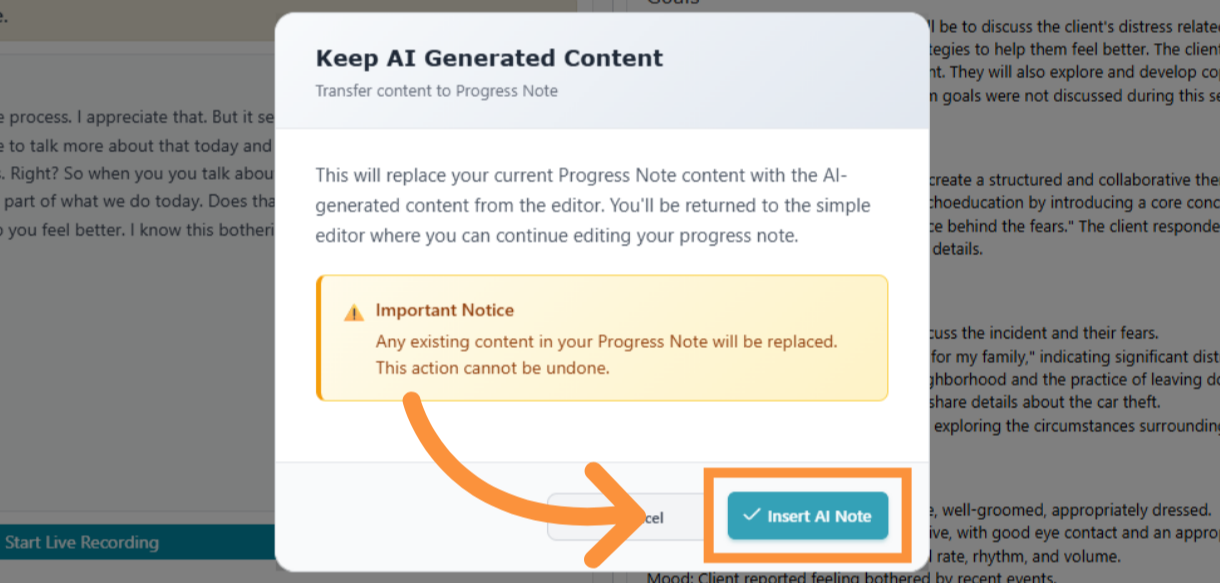
19. Confirm AI Note Insertion
Click Insert AI Note again to confirm the transfer.
Important: This action replaces the current content of your Progress Note with the AI-generated version and cannot be undone.
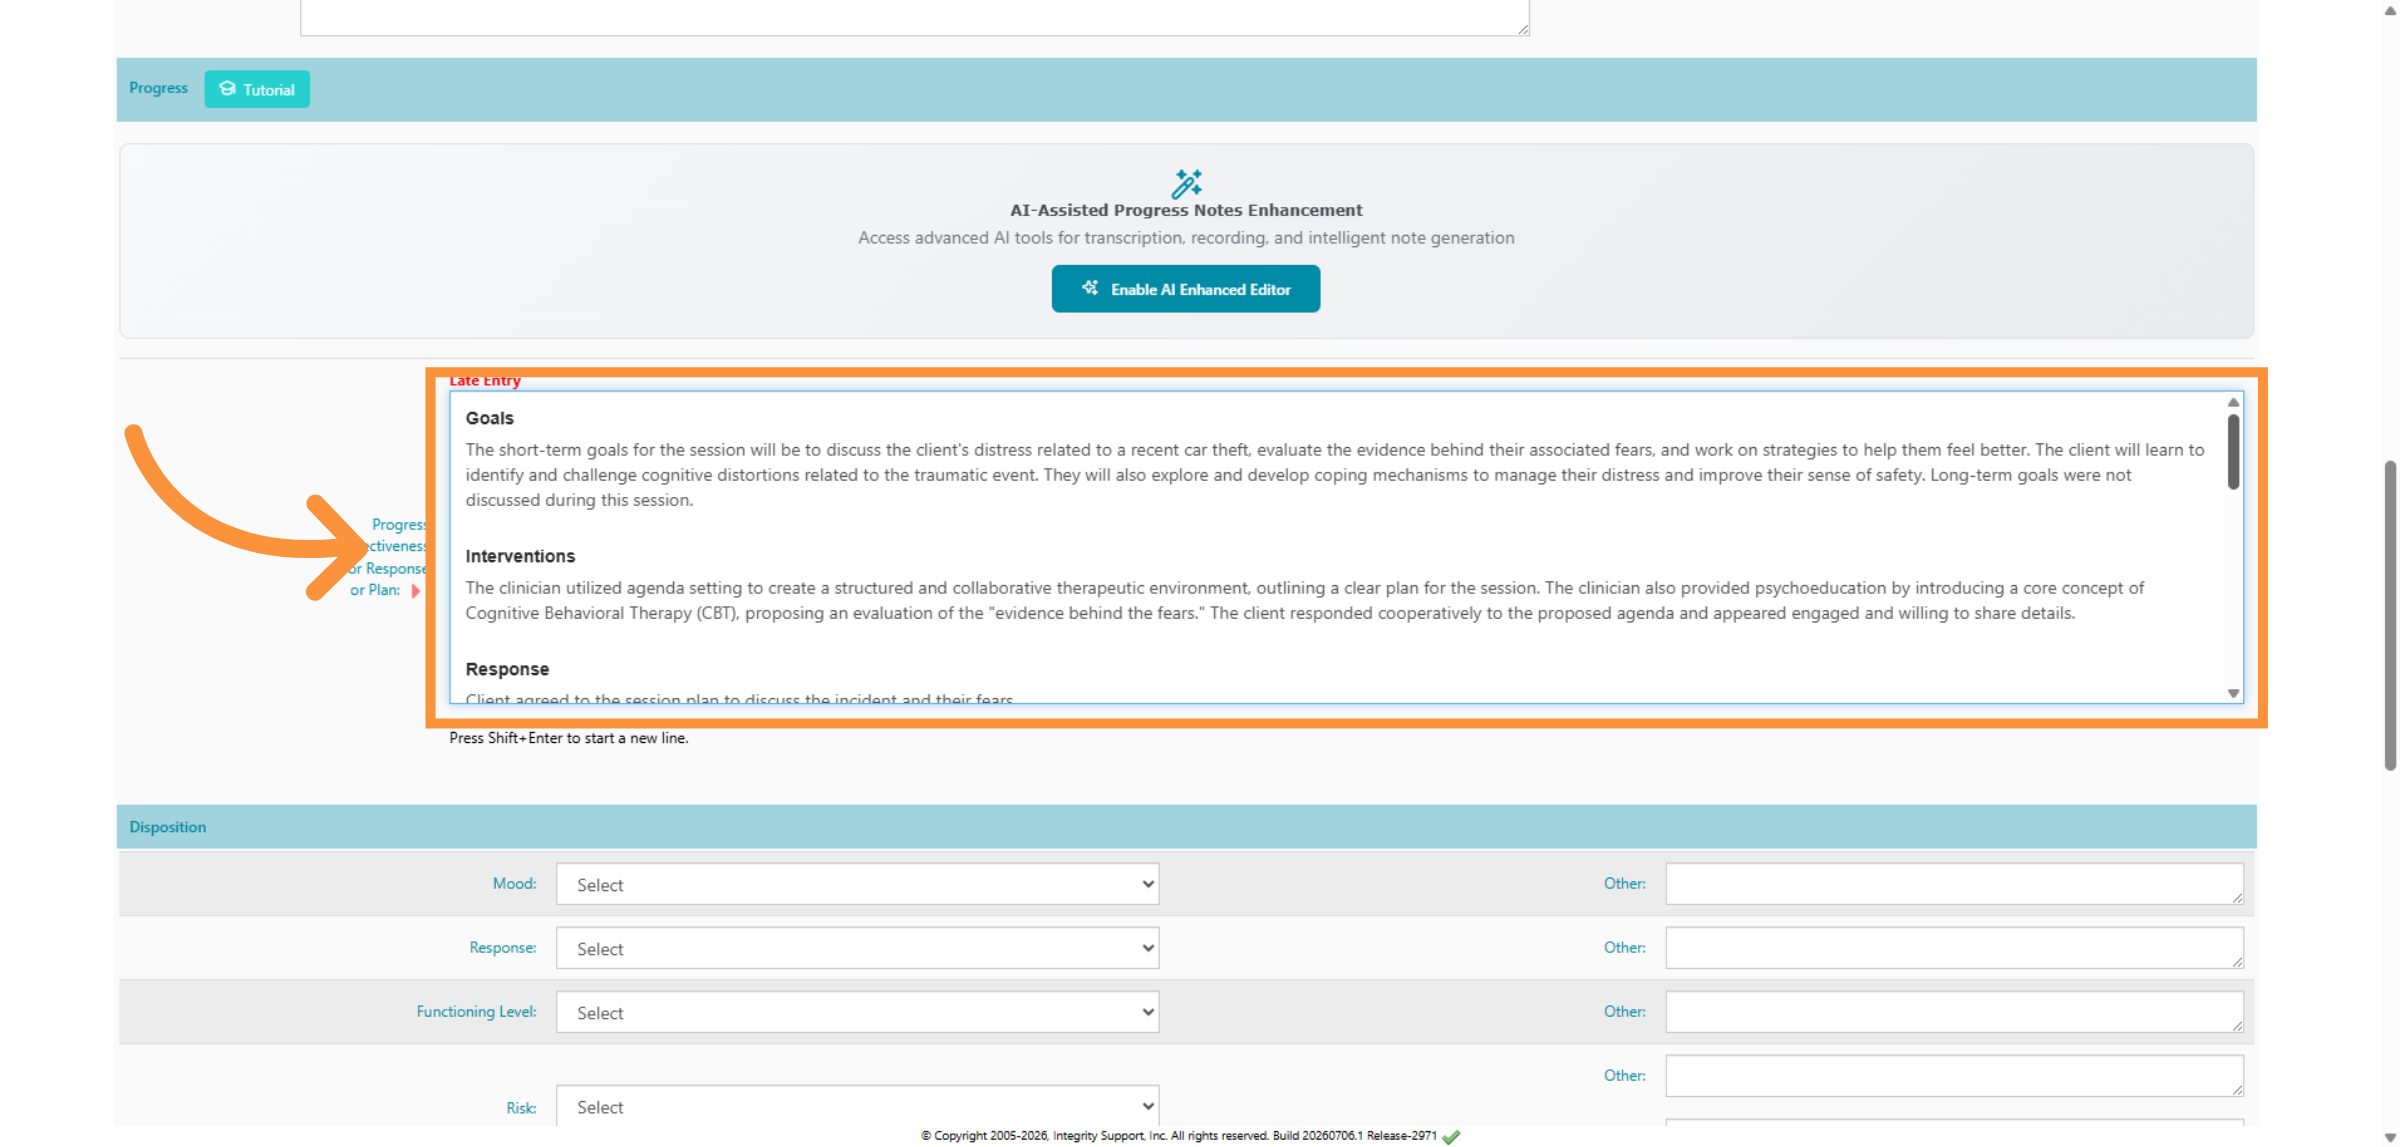
20. Complete Your Progress Note
Your AI-generated documentation has now been inserted into your progress note.
Review the final documentation, make any additional edits needed, then complete, sign, and submit your progress note using your organization's normal workflow.
Comments
0 comments
Article is closed for comments.